Dogs | Grooming | Health
How do I Clean my Dog’s Ears? Ultimate 2026 Step-by-step Aussie Guide
Did you know ear infections are one of the top reasons Aussie dogs land at the vet? Or that floppy-eared breeds — especially the ones who fancy a splash — are more likely to trap moisture, wax, and the occasional sand dune? Factor in our humid summers, beach runs, and dusty bush tracks, and it’s no wonder our pups’ ears need a bit of extra TLC. It’s not too hard once you know the steps, and with the right tools and a calm approach, even the wriggliest dog can learn to sit still (well, mostly). But here’s the thing — keeping on top of ear hygiene doesn’t just keep things smelling fresh, it can save your dog from real discomfort. It’s a similar principle to doggy dental care. And it’s not as tricky as it sounds… if you know what to look for.
The Upshot
Healthy ears need leaving alone — over-cleaning is the most common ear-care mistake Aussie owners make.
Aim for a weekly check, but only clean when you actually see wax, dirt, or hear a head shake. Use a vet-recommended solution and gauze — never cotton buds. After swims and beach days, dry the ear opening properly. Anything red, smelly, or painful is vet territory, not a home job.
Best Ear Cleanser

Virbac Epi-Otic Advanced Ear Cleanser
- Dries moisture, prevents infection
- Gentle formula for regular use
- Pricier than generic alternatives
More in our Dog Grooming hub
Best Ear Wipes
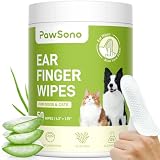
PawSono Ear Finger Wipes
- Easy fit on your finger
- Mild natural ingredients
- Single-use cost adds up
More in our Dog Grooming hub
For Aussie dogs, our warm climate and active outdoor life can be a recipe for ear problems if we’re not careful. Moisture from a swim or dust after a day out can irritate their ears and lead to infections, which are a common reason for vet visits.
In this guide, we’ll explain why ear care matters, walk you through how to clean your dog’s ears safely at home, and point out when it’s time to see your vet for help. Bruce has done a thousand swims; he’s also had two ear infections — so this is one of those grooming basics that’s worth getting right early rather than late.
Quick Takeaways
The five things worth remembering. Scroll across to read all five.
Check, don’t clean
Weekly checks catch trouble early — look for redness, smell, or excess wax. But if the ear looks clean and dry, leave it alone. Over-cleaning strips protective wax and invites the problems it was meant to prevent.
Vet-grade solution only
Use a dog-specific ear cleaner from your vet or pet shop. Skip the home remedies — vinegar and hydrogen peroxide sting and irritate. Cotton buds are a hard no anywhere near the canal.
Gentle technique
Lift the flap, apply solution to the canal opening, massage the base for 20–30 seconds, let your dog shake, then wipe the visible parts with gauze. Calm, slow, treat-rewarded.
Dry after water
Australian humidity and post-swim ears are an infection waiting to happen. Towel-dry around the ear opening and under the flap after every bath, beach trip, or creek splash. Thirty seconds prevents months of grief.
Know the line
Red, swollen, painful, or genuinely smelly ears aren’t a home job — they’re a vet visit. Dark coffee-ground discharge can mean mites; yeasty smells suggest infection. Treating the wrong thing at home wastes time.
Why and when to clean your dog’s ears
A healthy canine ear is pretty good at taking care of itself. Dogs naturally produce ear wax that traps dust, and most of the time their ears stay clean without any help. In fact, if your dog’s ears look clean, dry, and odour-free, it’s best to leave them alone rather than over-cleaning.
So when should you step in? Some dogs do need regular ear cleaning, especially breeds with long floppy ears (like Spaniels) or lots of inner-ear hair (like Poodles). Those floppy ears create a snug, humid space where yeast and bacteria thrive, and hair can trap debris. Dogs that swim often (looking at you, Bruce) or that have allergies are also prone to waxy, dirty ears and infections. For these pups, routine gentle cleaning can help keep the ear canals clear of build-up.
Australia’s environment can play a role too. Warm, humid weather (common up north) encourages yeast infections in ears, and dusty outback or bush conditions can introduce grass seeds or grime. After a beach day or a romp through long grass, it’s wise to check your dog’s ears. If you notice a bit of dirt or wax, a cleaning is probably a good idea to prevent trouble. But if you see concerning signs — heavy dark discharge, a really bad smell, redness, or your dog yelping and scratching at the ear — skip the home cleaning and head to the vet. A painful, smelly ear could mean an infection or ear mites, and only proper treatment (medicated drops, for example) will fix that.
In short, regular ear checks and cleaning when needed will help avoid bigger dramas — but know when to call the vet for backup.
Preparing to clean your dog’s ears
Before you start, gather everything you’ll need and choose a good spot for ear cleaning. Preparation helps things go smoothly and keeps your dog calm. Pick a quiet moment when your pup is relaxed — maybe after a walk when they’ve burned off energy. It also helps to have good lighting and to wash your hands. By having the right tools ready (and some treats on standby), you can focus on the task without scrambling for supplies.
| Item | Details |
|---|---|
| Dog ear cleaning solution | A gentle, vet-recommended cleaner from a pet shop or vet clinic. Avoid anything with harsh alcohol or hydrogen peroxide, as these can sting or irritate. Most commercial ear cleaners in Australia are designed to dissolve wax and dry quickly. |
| Cotton balls or gauze | For wiping out debris and drying the ear canal. Use soft cotton wool or gauze pads — they won’t damage the ear and won’t push gunk further in. Never use cotton buds (Q-tips) deep in the ear, as they can cause damage. |
| Towel | Ear cleaning can get messy. A towel on your lap or under your dog’s head will catch excess solution, wax, or any shakes. It also helps keep your dog from slipping if they’re on a table or your lap. |
| Treats | Tasty rewards to make the experience positive. Have a few small treats ready to give during and after the cleaning. This helps your dog form a good association — Bruce only tolerates ear cleaning because he knows a yummy treat follows. |
| Helper (optional) | If your dog is wiggly or large, a second person can be handy. A friend or family member can gently hold your dog’s collar or keep them distracted with pats and encouragement. This extra set of hands can make the process safer and less stressful for you both. |
Step-by-step ear cleaning guide
Once you have your supplies and your dog is in a calm mood, it’s time to clean those ears. Stay relaxed and upbeat — dogs pick up on our tone. If you make it feel like no big deal (maybe even a fun little massage), your pup is more likely to cooperate.
-
Settle your dog and lift the ear flap.
For a medium or large dog, have them sit in a corner or against a wall so they can’t back away. For a small dog, place them on your lap or on a sturdy table. Gently hold the ear flap up to open the ear canal — if your dog has floppy ears, fold the flap back over your hand so you can see what you’re doing.
-
Apply the cleaning solution.
Keeping the ear flap elevated, insert the bottle nozzle just into the ear opening (not deep — just at the entrance) and squeeze the recommended amount into the canal. Don’t worry if a bit spills out. Never shove the bottle tip down into the ear; just let the liquid flow in.
-
Massage the ear base.
Still holding the ear up, gently massage the base of the ear (right below the opening) for about 20–30 seconds. You should hear a squelchy “washing” sound. This helps the cleaner break up wax and dirt deeper in the canal. Most dogs actually enjoy this part — it’s like a mini ear rub.
-
Let your dog shake, then wipe.
Let go of your dog’s ear and step back for a moment. Your dog will likely shake their head vigorously, flinging the dissolved wax and cleaner out. Then take a cotton ball, gauze, or finger wipe, and gently wipe the inside of the ear flap and the canal opening — only what you can see. Use a fresh wipe if the first gets dirty, and continue until the wipes come away mostly clean.
-
Repeat on the other ear and reward.
If both ears need cleaning, do the same on the other side. You can give your dog a breather and a small treat in between if they’re getting antsy. When you’re done, lavish your pup with praise and a final treat or play session. Ending on a positive note makes them more willing next time.
When to skip the home clean and see a vet
Ear cleaning shouldn’t hurt your dog. If your dog’s ear is very red, sore, or they’re flinching from your touch, stop and book a vet appointment instead. There’s also no need to clean ears on a strict schedule — check them often and clean when there’s visible dirt or as your vet advises.
A painful or smelly ear could be a yeast infection, bacterial infection, mites, or a foreign object lodged in the canal — none of which a home clean will fix. Medicated drops, sedation for removal, or a proper flush at the clinic is the right move. Early action also costs less; a $90 consult beats a $400 chronic-otitis treatment plan every time.
FAQ
My dog hates ear cleaning. How can I make it easier?
Many dogs aren’t thrilled at first with ear cleaning, but patience and positive training can help. Start by getting your dog used to you touching and gently massaging their ears when no cleaning is happening — give treats and praise so they associate ear handling with good things. During the cleaning, be soothing and go slowly. If your dog only tolerates a bit, just do one ear at a time and take a break. Always reward them after each session, even if it didn’t go perfectly. Over time, with a consistent routine, most dogs learn to accept it. If your dog is truly freaking out or you’re worried about getting bitten, don’t force it — you might need to enlist your vet or a groomer for help. They have experience (and extra hands) to clean tricky dogs’ ears safely.
How often should I clean my dog’s ears?
It depends on your dog’s breed, lifestyle, and ear health. Some dogs rarely need their ears cleaned at all — if your pup’s ears are clean and odour-free, you can leave them be. In fact, vets say healthy ears are best left alone. On the other hand, dogs prone to ear issues (floppy-eared breeds, frequent swimmers, allergy-prone dogs) might need a gentle clean every week or two. A smart approach is to check your dog’s ears weekly for wax, gunk, or smells. If they look dirty or whiffy, give them a clean; if they’re fine, no need to mess with them. Always follow your vet’s advice on cleaning frequency — they may recommend a routine if your dog has chronic ear problems.
Can I use cotton buds (Q-tips) to clean my dog’s ears?
No. You should never put cotton swabs or Q-tips down into a dog’s ear canal. It’s very easy to accidentally push debris further in or even hurt your dog’s eardrum. Plus, a dog’s ear canal has an L-shape, so you won’t really reach the deeper part with a straight swab anyway. Stick to cotton balls, gauze, or finger wipes to wipe the parts of the ear you can see. If you suspect something is stuck deeper or there’s a lot of build-up, let a vet handle it with the proper tools.
What is the brown gunk in my dog’s ears?
Brown, waxy gunk is usually just ear wax mixed with dirt. A little light-brown wax is normal — it helps trap dust. But if you’re seeing a lot of brown or black discharge, especially if it smells yeasty or foul, it could be a sign of trouble. Ear mite infestations (more common in puppies or outdoor dogs) can cause crumbly dark brown/black debris that looks like coffee grounds. Yeast or bacterial infections often produce a smelly brown discharge too. If your dog’s ears are very mucky, cleaning might help a bit, but it’s important to address the underlying cause. If that brown gunk keeps coming back or is accompanied by redness and itching, pop down to the vet. They can determine if it’s an infection, mites, or just excess wax, and treat it properly.
Should I pluck the hair from inside my dog’s ears?
Unless your vet specifically advises it, you generally shouldn’t pluck the hair inside your dog’s ears. Plucking can irritate the delicate skin in the ear canal and cause inflammation. These days, many Aussie vets say if ear hair isn’t causing an issue, it’s best to leave it alone. For breeds with very hairy inner ears (like poodles or spaniels), you can ask your vet or a professional groomer if a gentle trim is needed. Often, just keeping the hair around the ear opening neatly trimmed (not the hair deep inside) is enough to improve airflow. Only remove ear hair if it’s matted, filthy, or contributing to repeated infections — and let a pro show you how to do it safely, as dogs understandably don’t love having their ear hairs yanked.
Final thoughts
Cleaning your dog’s ears might never be their favourite activity, but it’s a small task that makes a big difference to their health. With the right technique and a bit of practice, it gets easier each time. Every dog is different — some (like Bruce) will always be a bit dramatic, while others hardly notice. The key is to be gentle, use the proper tools, and know when to let the professionals handle it. By keeping an eye on your pup’s ears and cleaning when needed, you’re preventing pain and problems later. Stay patient and positive, and always end with a treat and a pat for your mate — healthy ears mean a happier dog and more adventures ahead.